
In this how-to, we’ll take a look at how to monetise your Xamarin.Forms app with one of the most popular ad networks, AdMob.
The process is pretty straightforward and consists of 4 main steps:
- Set up your apps and ads in the AdMob portal and get some Id’s,
- Install some nuget packages with the AdMob bindings and initialise the ads,
- Create a simple control with some custom renderers,
- Add that control to your common XAML page.
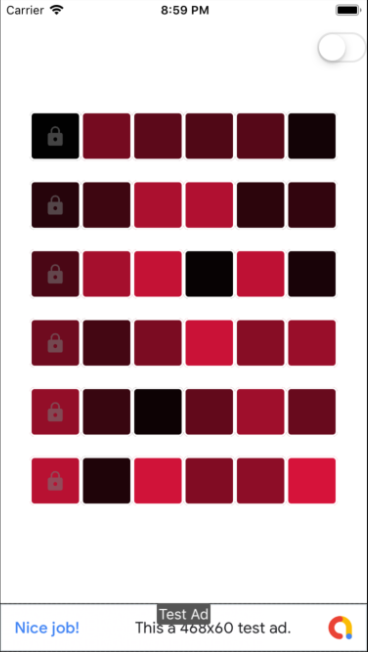
As an example, we’ll take a little Xamarin.Forms game that I’ve been working on in my spare time and add a banner ad to the bottom of the main game page. I’ve got a 50px row at the bottom of the main grid ready to take the new ad control.
Register your app and ads with AdMob
Head on over to https://admob.google.com and sign up or sign in. On your dashboard click on Apps, New App and enter the details. You’ll need to do this for iOS and Android separately and you’ll get an App Id for each one that looks like this:
ca-app-pub-1234567891234567~1234567890
Once your apps are set up, add an ad unit for each. I’m going to choose a banner ad, because that fits my UI best. Once the ad unit is set up, you’ll get an Ad ID, like this:
ca-app-pub-1234567891234567/1234567890
Android
Install the Xamarin.Firebase.Ads nuget package into your Android project and initialize the ads in your MainActivity, just before the Xamarin.Forms.Forms.Init, substituting the correct App Id for Android:

Android.Gms.Ads.MobileAds.Initialize(ApplicationContext,
"ca-app-pub-1234567891234567~1234567890");
Android requires a couple of special permissions, so make sure that INTERNET and ACCESS_NETWORK_STATE are selected in your manifest.
Now we can create a custom renderer – I like to keep mine in a specific CustomRenderers folder and I’m going to call it AdMobViewRenderer:
[assembly: ExportRenderer(typeof(AdMobView), typeof(AdMobViewRenderer))]
namespace SpotIt.Droid.CustomRenderers
{
    public class AdMobViewRenderer : ViewRenderer<AdMobView, AdView>
    {
        public AdMobViewRenderer(Context context) : base(context) { }

        private AdView CreateAdView()
        {
            var adView = new AdView(Context)
            {
                AdSize = AdSize.SmartBanner,
                AdUnitId = "ca-app-pub-3940256099942544/6300978111",
                LayoutParameters = new LinearLayout.LayoutParams(LayoutParams.MatchParent, LayoutParams.MatchParent)
            };

            adView.LoadAd(new AdRequest.Builder().Build());

            return adView;
        }

        protected override void OnElementChanged(ElementChangedEventArgs<AdMobView> e)
        {
            base.OnElementChanged(e);

            if (e.NewElement != null && Control == null)
            {
                SetNativeControl(CreateAdView());
            }
        }
    }
}
Remember to substitute your own Ad Id.
AdMobView won’t be able to be resolved yet because we haven’t created the shared control.
iOS
For your iOS project you’ll need to add the Xamarin.Firebase.iOS.MobileAds and Xamarin.Google.iOS.MobileAds nuget packages. I have found that the version 7.27 is currently the latest that works for me, so be aware of that.

In your AppDelegate add the initialisation code, just before the Xamarin.Forms.Forms.Init:
Google.MobileAds.MobileAds.Configure("ca-app-pub-1234567891234567~1234567890");
Remember, that’s the App Id.
Then, as with Android, we’ll need a custom renderer. Again, substituting your Ad Id:
[assembly: ExportRenderer(typeof(AdMobView), typeof(AdMobViewRenderer))]
namespace SpotIt.iOS.CustomRenderers
{
    public class AdMobViewRenderer : ViewRenderer<AdMobView, BannerView>
    {
        private Request GetAdRequest()
        {
            var request = Request.GetDefaultRequest();
            return request;
        }

        private BannerView CreateBannerView()
        {
            var bannerView = new BannerView(AdSizeCons.SmartBannerPortrait)
            {
                AdUnitID = "ca-app-pub-3940256099942544/6300978111",
                RootViewController = GetViewController()
            };

            bannerView.LoadRequest(GetAdRequest());

            return bannerView;
        }

        protected override void OnElementChanged(ElementChangedEventArgs<AdMobView> e)
        {
            base.OnElementChanged(e);
            if (Control == null)
            {
                SetNativeControl(CreateBannerView());
            }
        }

        private UIViewController GetViewController()
        {
            var windows = UIApplication.SharedApplication.Windows;
            return (from window in windows where window.RootViewController != null select window.RootViewController).FirstOrDefault();
        }
    }
}
Xamarin Forms
Finally, lets resolve that AdMobView symbol by creating the shared control in our Forms project:
using Xamarin.Forms;

namespace SpotIt.Views
{
    public class AdMobView : View
    {

    }
}
And use it in our XAML:

For this implementation I’m just using and empty View class because the custom renderers are doing all the work.
You can always build on this class to add functionality for different Ad Id and types etc.


Hi, I tried your sample, it works fine with your credentials, but not with mine. Do I need to do extra steps to register my admob id and unit id somewhere? Thanks
LikeLike
Hi. The ID’s in the examples should show a test ad. Double check that the App ID and Ad ID are in the right places. Also it’s worth making sure that the ad isn’t covered by any other UI – they are smart enough not to work if you cover them. If you have registered your own app and and ad in AdMob, it can take up to a few hours for the first real ad to show.
LikeLike
Hi Nigel, thanks for this article.
I receive the following error:
public AdMobViewRenderer(Context context) : base(context) { }
Error CS1729 ‘ViewRenderer’ does not contain a constructor that takes 1 arguments
Any help will be most appreciated, thanking you.
LikeLike
Hi Marco, what version of the MobileAds Nuget are you using? I had trouble with versions after 7.27 so I stopped updating and haven’t tried since.
LikeLike
Very helpful and simple to follow walkthrough. thanks for sharing
LikeLike
hello sir, can we use admob in uwp?
LikeLike
Hi, as far as I am aware, UWP apps are not supported 😦
LikeLike